At Hawk Engineering, we pride ourselves on delivering top-notch repairs that restore functionality and breathe new life into your camper or RV. Recently, we took on a challenging project—replacing a completely rotten floor in a travel trailer. With decades of experience and a dedication to getting the job done right the first time, we transformed a hazardous problem into a solid, lasting solution. Here's a closer look at this repair's process, challenges, and stunning results.
The Problem: A Rotten Foundation
When this trailer arrived at Hawk Engineering, it was clear the floor had seen better days. Years of wear and tear, coupled with water damage, had left the foundation compromised. Soft spots, sagging sections, and visible rot made the trailer unsafe for use. Left unchecked, this kind of damage can spread to other parts of the camper, leading to more extensive and costly repairs down the road.
Rotten floors are a common issue in trailers and RVs, often caused by leaks, high humidity, or inadequate maintenance. Once the wood becomes saturated with moisture, it begins to decay, losing its structural integrity. The owner of this trailer wanted to ensure their vehicle was safe and functional for many more adventures, and we were ready to help.
The Solution: A Step-by-Step Repair
Replacing a rotten floor isn’t a simple task, but it’s one we’re uniquely equipped to handle. Here’s how we tackled the project:
- Assessment and Planning
First, we conducted a thorough inspection to determine the extent of the damage. This step is critical to ensuring we address not only the visible rot but also any underlying issues that might contribute to future problems. We also discussed the repair plan with the owner, setting clear expectations for the timeline and costs. - Removing the Old Floor
The damaged sections of flooring were carefully removed. This step required precision to avoid damaging the surrounding structures. In some areas, we had to remove additional components, such as cabinetry and furniture, to access the affected areas. - Repairing the Subfloor
Once the top layer of the floor was removed, we inspected the subfloor and supporting framework. In this case, some of the subfloor required reinforcement to ensure a sturdy foundation for the new flooring. - Installing New Flooring
Using high-quality, water-resistant materials, we installed a new floor that’s built to last. We paid special attention to sealing edges and joints to prevent future water infiltration. - Reassembly and Finishing Touches
After the new floor was securely in place, we reinstalled all the removed components, ensuring everything fit seamlessly. The final step involved a detailed inspection to confirm the integrity of the repair.
The Results: Before and After
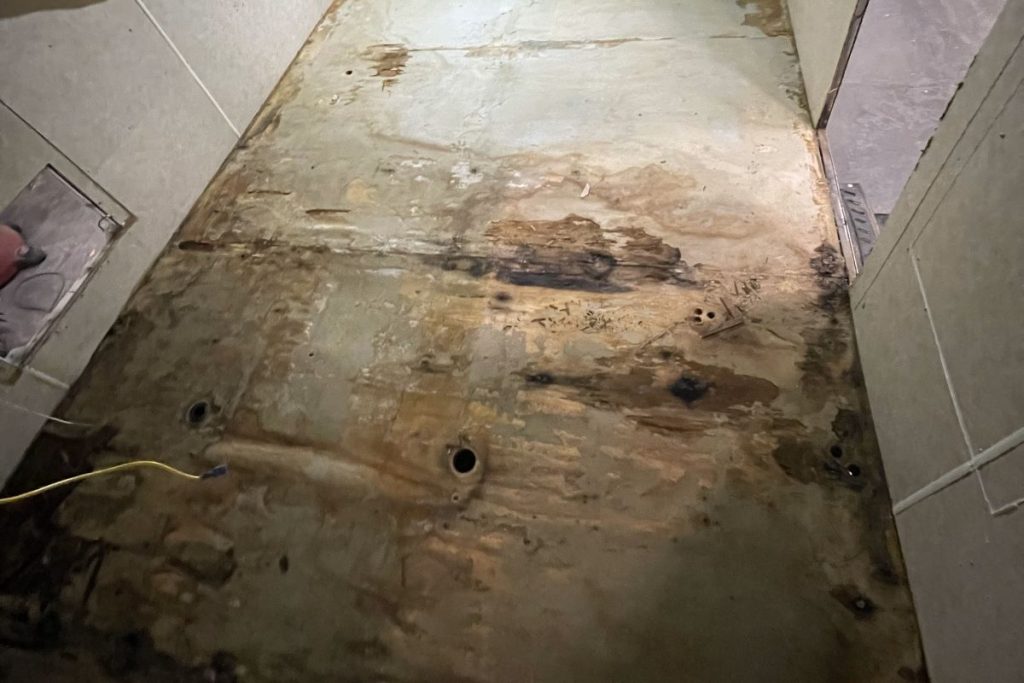
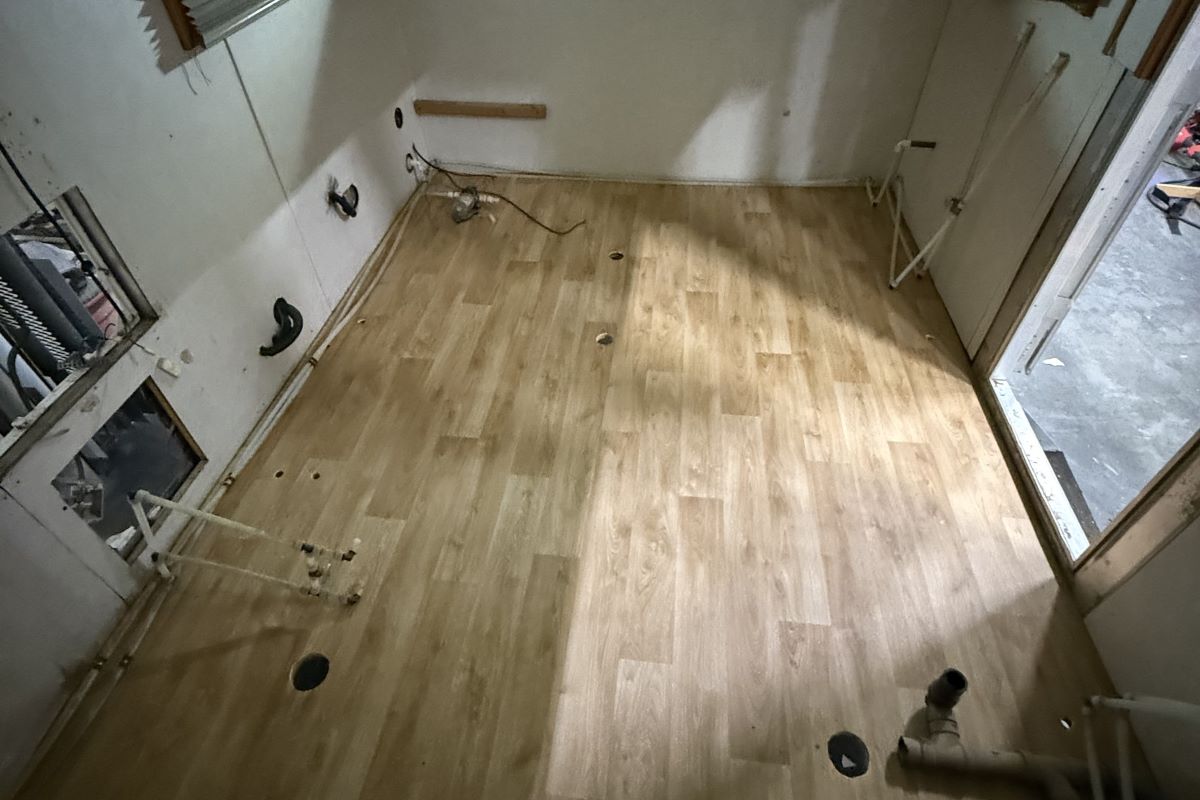
The transformation was remarkable. What started as a safety hazard became a safe, sturdy, and visually appealing floor. The before-and-after photos tell the story better than words ever could. The once-rotted floor, with its discolored and crumbling surface, is now replaced with a clean, solid foundation ready for years of adventures.
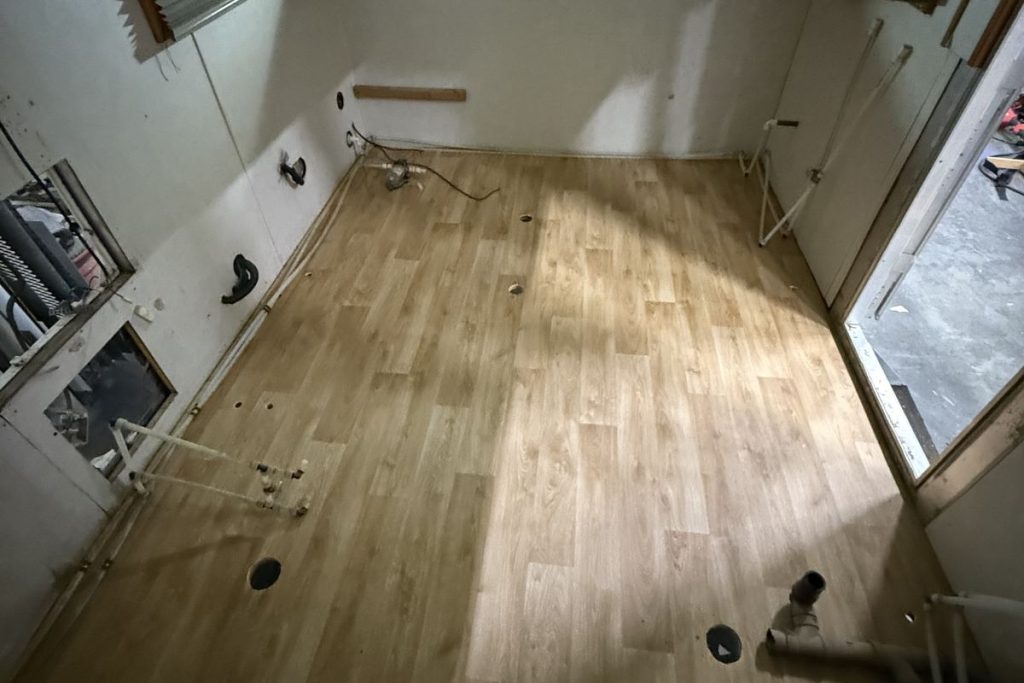
The trailer owner couldn’t have been happier with the results. We were thrilled to deliver a repair that restored the trailer’s usability and gave the owner peace of mind.
Why Choose Hawk Engineering?
Projects like these highlight what sets Hawk Engineering apart. Our commitment to quality, attention to detail, and genuine care for our customers’ needs ensure every repair meets the highest standards. Whether it’s a small patch job or a full-scale replacement, we approach every project with the same level of professionalism and expertise.
If your camper or RV has floor damage, don’t wait until the problem worsens. Contact Hawk Engineering, and let us help you get back on the road safely and confidently.
Ready to give your camper or RV the care it deserves? Contact us today to schedule an inspection or learn more about our comprehensive repair services. At Hawk Engineering, we’re here to keep your adventures rolling smoothly!